Pebbledash removal in Sutton-in-Ashfield
Pebbledash removal in Sutton-in-Ashfield
Removing pebbledash can be the first stage of a completely different exterior, but the covering hides information that affects the job. The masonry may need repair, may contain earlier alterations or may never have been intended as exposed brickwork. A sensible removal proposal includes both the stripping work and a clear route to a suitable finished wall.

On this page
Explain what you want to see afterwards
Begin with the desired result. A smooth-looking rendered elevation, a softer textured finish and exposed brickwork are different projects. If the intention is new render, the removal needs to leave a background suitable for that system. If the intention is bare masonry, the condition, appearance and weathering suitability of the brick or stone become central questions. Do not assume that one quotation covers both outcomes.
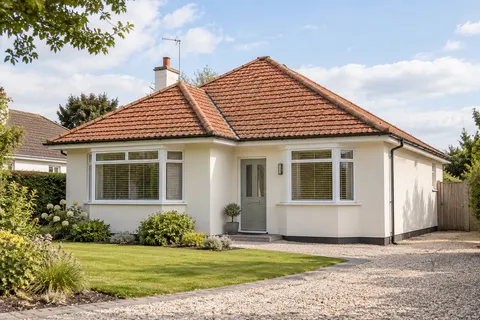
Photograph the full elevation and its edges. Show where the pebbledash meets brickwork, a porch, a roof or a later extension. Include patches that look different from the surrounding surface. The covering may have been applied in several periods with different materials beneath it. That makes a single view from the street an unreliable basis for deciding how easily the whole wall will strip.
The final appearance should be considered before removing sound material merely because its texture is unfashionable. A suitable retained surface may sometimes be treated through another specified system, while loose or incompatible layers may need removal. Ask for the reasons behind the proposed approach. Comparing those reasons is more useful than assuming that the most extensive stripping is automatically the most thorough job.
| Useful finding | Remaining uncertainty |
|---|---|
| Bond and layers at the trial | Other parts may differ |
| Visible masonry condition | Concealed defects remain possible |
| Likely removal approach | Access and protection still need planning |
| Preparation implications | Final repair quantity follows exposure |
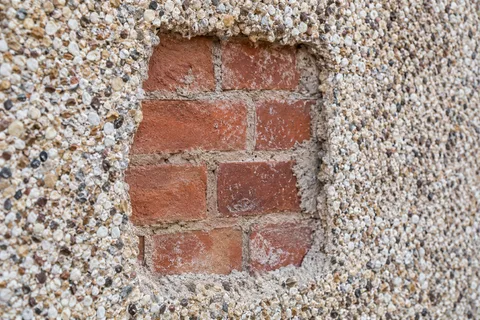
- Trial area A small patch is taken off to see how well the dash is bonded and what lies beneath.
- Removal Dash and backing render are hacked off to masonry or to a sound backing coat.
- Clear and dispose Debris is bagged or skipped; this is heavy, dusty and noisy work.
- Repair the masonry Exposed bricks, blocks and joints are repaired before anything new goes on.
- New render system The wall is rendered with the chosen system, or left as fair-faced masonry if suitable.
The usual order of work. The survey and the chosen products decide the actual steps.
Use a trial to reduce uncertainty
A controlled test area can show how the coating is attached and what removal does to the background. Its position should be chosen deliberately, with a record of why that part of the wall was selected. A conveniently loose patch may not represent a tightly bonded area elsewhere. Where the elevation varies, more than one trial may be needed to understand the range of conditions.
Record the layers revealed, the condition of the masonry face and the approximate depth of repairs likely to be needed. The trial should also clarify the stopping point: whether the work aims to remove a decorative dash layer, a whole render build-up or specified loose areas only. A phrase such as hack off can conceal those differences unless it is explained in the written scope.
A trial improves information but does not turn a concealed wall into a fully known quantity. The proposal should explain how unexpected defects will be documented and authorised during the job. Agree who is contacted, what evidence is supplied and how temporary protection is maintained while a decision is made. That process is useful even where the initial test suggests straightforward removal.
Protect the property and the route to it
Removal produces debris close to the wall and needs a planned working area. Discuss protection for windows, roof coverings, paving, drains and plants. A narrow side passage can complicate waste handling even on a single-storey building. The contractor should decide the equipment and safe method; the homeowner can help by identifying access restrictions, fragile surfaces and items that cannot be moved.
Ask where waste will be placed and how it will leave the site. A route across the garden or through a shared drive should not be assumed available. Keep an entrance usable and make arrangements for pets and children while the work is underway. If neighbouring property is close, establish how it will be protected and how any required access is agreed before equipment arrives.
Some fittings may need temporary removal to reach the surface properly. Identify downpipes, cables, lights and vents in advance, including which items require another qualified trade. A strip of old render hidden behind a pipe can become an awkward weak point in the replacement scheme. The scope should make clear how those areas will be dealt with and who reinstates the fittings.
Inspect the revealed background before covering it
Once an area is exposed, photograph it before repairs and new coats conceal the evidence. Note earlier openings, different masonry units, cracks and damaged faces. The contractor may need to revise the preparation plan if the background differs from what was anticipated. A revised detail is better than proceeding with a product selected for a wall that is not actually present.
Loose mortar, damaged masonry and unresolved water entry should be considered in the appropriate repair scope. New render is not a substitute for structural assessment or for fixing a leaking rainwater fitting. Equally, the wall should not be left unprotected indefinitely while decisions drift. Agree how the exposed elevation is managed between removal, inspection and reinstatement.
Older construction can require a different approach from a modern block background. Lime rendering may be relevant after an assessment of the materials and condition. The fact that a previous covering contained cement does not establish that another cement-rich system is the correct replacement. Where conservation requirements apply, keep the relevant advice with the specification and do not discard uncovered historic detail without review.
Price and inspect the whole sequence
A removal-only figure and a removal-plus-render figure cannot be compared as though they cover the same result. Separate access, protection, stripping, repairs, new system, fittings and waste in the scope. Monetary allowances depend on the actual property, so this page does not give a generic price that hides those differences. Ask what is fixed and what depends on inspection after removal.
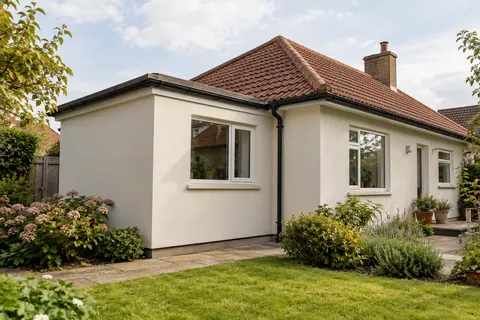
Silicone rendering and monocouche rendering offer different routes to a new coloured finish on suitable backgrounds. Consider their texture, junctions and maintenance alongside appearance. If external wall insulation is being considered, settle that before the wall is prepared for a render-only scheme. Adding it later can change the roofline, sills and pipe positions that have just been completed.
At handover, retain photographs of the stripped wall and the repairs as well as the finished elevation. Check that the replacement finish reaches the agreed boundaries, protection has been removed and fittings have been reinstated correctly. Keep the product and colour information for future maintenance. The useful record is the sequence from concealed wall to finished system, not simply a final photograph from the road.
Common questions
Will removal expose brick suitable to leave bare?
That cannot be established from the outside of the covering. The brick may have previous repairs, damage or a surface that was never intended to remain exposed. Set out a fallback finish before removal starts, with a clear point for reviewing the revealed condition and authorising any changed work.
See housing and planning information for Sutton-in-Ashfield and nearby places, including the source and geography behind each figure.