External wall insulation in Sutton-in-Ashfield
External wall insulation in Sutton-in-Ashfield
External wall insulation changes the construction of the outer wall, not just its colour. A designed system combines insulation, fixings, reinforcement and a protective finish with details around every opening and edge. For a Sutton-in-Ashfield property, the starting point is a building assessment that establishes whether the approach is suitable and what other work it requires.

On this page
Establish the building and the brief
Identify the wall construction, condition and any previous insulation or remedial work. Damp, structural problems and defective rainwater goods should be addressed as part of the assessment rather than concealed beneath new layers. Keep available drawings and survey reports together. A product name or a general description of the house does not provide enough information to design the complete installation.
Explain whether the project covers every elevation or only part of the building. An uninsulated extension, a garage wall and the main heated house may need different treatment. The designer should define the boundary of the work and how it connects to the rest of the envelope. A partial scheme needs a considered junction where the new thickness stops; it is not simply the same wall with fewer boards attached.
Discuss ventilation, openings and the intended internal use alongside the external appearance. Insulation decisions should be coordinated with the overall condition of the property. The assessment should explain the relevant building-control and planning requirements for the actual scheme. This page does not infer permission, compliance or savings from a postcode or from the fact that another house nearby has been insulated.
| Location | Decision to resolve |
|---|---|
| Roof edge | Protection over the new wall thickness |
| Windows | Sill projection and reveal treatment |
| Fittings | Relocation and compatible fixing |
| System boundary | Designed termination against retained work |
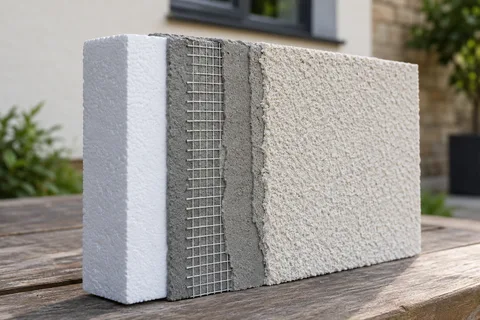
- Existing wall Prepared; fittings removed and the base track fixed above ground level.
- Insulation boards Bonded with adhesive and, in most systems, mechanically fixed to the wall.
- Basecoat with mesh Reinforcement mesh embedded across the board joints and around openings.
- Primer Where the system requires it.
- Finish render A thin-coat finish that weatherproofs the insulation.
Wall on the left, finish on the right. Not to scale: coats, thicknesses and primers follow the chosen manufacturer’s system and the condition of the wall.
Work through the roof edge before ordering materials
The added thickness changes where the finished face sits beneath the eaves and verge. Ask for a detail showing how the top of the system is protected and how it relates to the roof covering and gutter. A short existing overhang can create work outside the insulation package. Agree who designs and completes that work before the scaffold or working platform is arranged.
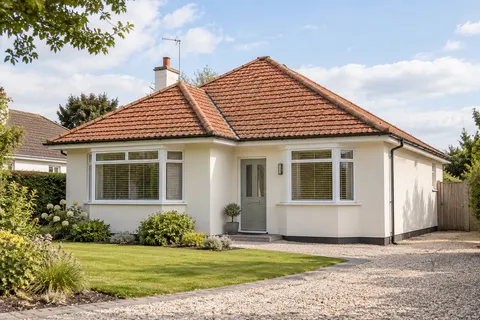
On a bungalow, these junctions can be visible from close range and can extend around a large proportion of the building. A neat front detail is not enough if the rear edge has different conditions. Include low roofs, porches and attached structures in the survey. Each change of roof height can introduce a junction that needs an explicit solution.
Do not settle for an instruction to seal the top where a durable construction detail is required. The system should shed water appropriately and remain inspectable where maintenance is expected. The designer and relevant trades need to agree the sequence. Reworking an edge after the decorative finish is complete can damage several layers and make a repair more complicated than getting it right at the design stage.
Coordinate windows, sills and ventilation
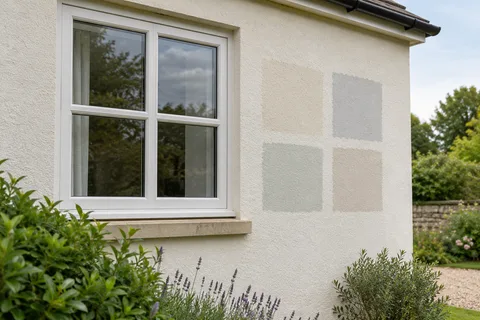
Existing sills may not project far enough beyond the new wall face. Ask how extensions or replacements will work, including the ends and junction with the frame. Reveal treatment also needs consideration: the available width around a window can limit the detail. If replacement windows are planned, decide their position and installation sequence together with the insulation design.
Vents, air bricks and service openings must retain their required function. Record them on the elevation drawings rather than leaving the installer to discover them behind equipment. Any change to a flue or a specialist installation needs the appropriate competent trade. An attractive finished surface is not an acceptable reason to bury an opening or make a service inaccessible.
Where a porch or conservatory abuts the wall, access and continuity may be difficult. The proposal should explain what is and is not being treated behind those structures. Hidden interruptions should be recorded, not omitted from the discussion because they cannot be seen in the finished photograph. Ask how the selected detail affects future maintenance of both the insulation and the adjoining structure.
Treat attachments as designed penetrations
Downpipes, cables, lights and other fittings usually need more consideration than being unscrewed and put back. The fixing must suit the system and the load, and the penetration needs the appropriate detail. Identify heavy or regularly used items early, including gates, awnings and exterior taps. The surface finish alone is not a structural fixing point.
Keep a schedule showing what is moved, who moves it and where it returns. A pipe placed too close to the new face may be difficult to inspect or maintain. Equipment may need a new bracket or a different route. Those changes affect the quotation and should be included before the decorative layer is applied, rather than improvised by drilling through completed work.
Discuss future alterations too. If a satellite dish, light or canopy may be added later, keep the system details available for the installer. INCA's maintenance guidance treats physical alterations as a separate subject because the owner needs to understand what has been installed. A generic screw and sealant approach should not replace advice for the actual system.
Compare complete systems and completion records
The specification should identify the insulation type and thickness, fixing approach, base coat, reinforcement and finish as an approved combination for the design. Silicone rendering may form the visible finish in a suitable system, but its colour is not the main technical decision. Product substitutions should be reviewed against the complete specification rather than accepted because two tubs look similar.
Ask which stages will be inspected and what evidence will be retained before layers are covered. Junction photographs, product records and the completed design help explain the installation later. At handover, obtain maintenance guidance and a clear route for reporting damage. Use documented system information and property-specific assessments when comparing expected performance and future maintenance.
If the main aim is only to change the appearance, compare the scope with house rendering without insulation. The two projects have different implications and should be described separately. If insulation remains the preferred option, resolve the interfaces before committing to the final colour. A coherent design at the roof, ground and openings matters more than choosing the decorative finish first.
Common questions
Can the downpipes stay in their current position?
The proposed insulation thickness and wall details determine that. The designer needs to show how the fittings, outlets and access for maintenance will work outside the new face. Do not accept a plan that leaves these decisions until the finish is complete; moving a fitting later can damage several layers of the system.
See housing and planning information for Sutton-in-Ashfield and nearby places, including the source and geography behind each figure.